
I’ve grown to love my eyebrows thanks to lamination! Testing Nanobrow Lamination Kit
Hello!
I’m back from a short hiatus. Got a hot topic! 🙂
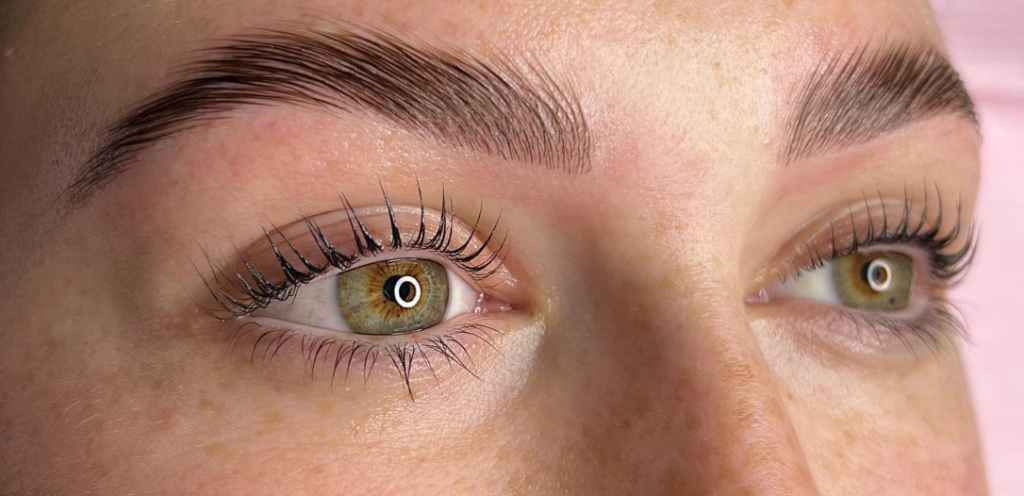
Eyebrow lamination which lets you achieve lifted, fluffy and shiny arches, is becoming a more and more popular cosmetic treatment. If you want to create a similar effect in the comfort of your home, you can try at-home brow lamination. You may come across numerous practical sets able to help you perform the treatment on your own. Thanks to eyebrow lamination, I’ve grown to love my natural eyebrows. Now, they are the cherry on top of my makeup, adding some lightness to my look.
Which brow lamination kit do I recommend? What effects can you expect from performing lamination at home? I prepared a mini-guide regarding eyebrow lifts and how to prepare for them. Let’s go!
Brow lamination with Nanobrow Eyebrow Kit – effects on my eyebrows
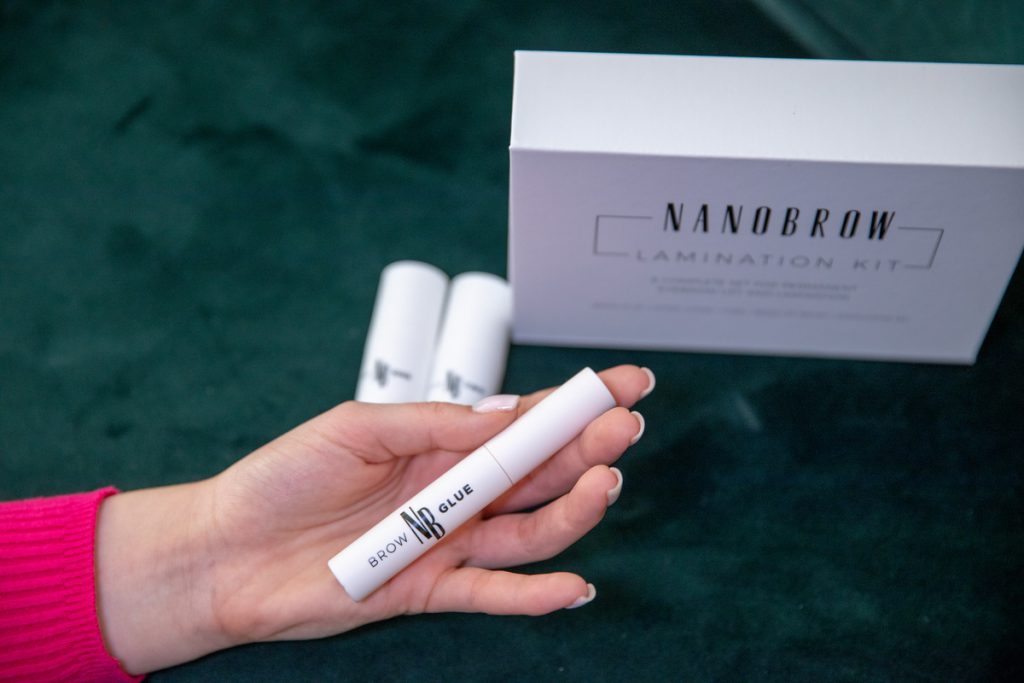
At-home brow lamination is my favourite “beautifying” procedure. Among numerous lifting sets, I chose the test-and-tried Nanobrow Lamination Kit, The price and positive reviews have convinced me. I also know that its formula is completely safe for sensitive skin. Because I like beautiful things, I was also amazed by the elegant and minimalistic packaging.
It’s worth mentioning that such a lamination kit allows you to save a ton of money. It lasts you for about 10 uses and the effects are visible for about 1,5 months.
Eyebrow lamination made my face look more delicate and lifted and my eyes – more expressive. My arches became noticeably fuller and thicker and my hair – much shinier. Eyebrows are and more prone to styling so all you need to do is comb your hairs with a brush. Of course, you can always enhance the look with a powder, pencil or pomade – brow lamination is not a problem. Quite the contrary – perfectly styled and nourished hairs add a lot of freshness to the makeup.
What kind of effects can you expect from brow lamination with Nanobrow Lamination Kit?
- hair is tamed, styled and lifted in the desired way
- nourishing substances smooth and add shine to the hair follicles
- everyday brow styling becomes comfortable
- you’re able to style eyebrows as per your preferences
- brow lifting lasts for about 6 weeks
- you create the trendy “fluffy brows”
How to laminate your eyebrows at home?
It’s crucial to follow the instructions on the packaging of the brow lamination kit. Inside Nanobrow Lamination Kit you can find detailed instructions, labelled products and necessary tools.
Lamination in just 3 steps:
Step 1: What to avoid
Avoid face scrubs and exfoliation in the eyebrow area, henna or waxing and plucking. Right after you laminate eyebrows, try not to wet or wear makeup as cosmetics used during the treatment need time to reach inside of the hair.
Step 2: Prepare your eyebrows
Remove your makeup thoroughly focusing on eyebrows. Cleanse them from any makeup residue with an oil-free makeup remover. Next, dry them and comb them with a brush.
Step 3: Brow lamination
Prepare all tools and cosmetics that came with the set: Brow glue, Lifting lotion – StepOne, Fixer – StepTwo, a spoolie, a brush and an applicator. Make sure you have a few cotton pads ready, as well.
- Apply a small amount of glue using an applicator and spread an even layer of it on your eyebrows.
- Wait 25-50 seconds.
- Use a brush to apply the lifting lotion, directing your hairs as desired.
- Let it sit for 5-8 minutes.
- Remove it with a dry cotton pad.
- With a brush, apply the fixer to shape your eyebrows.
- Wait 5-8 minutes.
- Remove it with a wet cotton pad.
That’s all. After all these steps, your arches are going to look beautifully styled, fuller and shinier. I began to love my arches even with no makeup thanks to at-home lamination with Nanobrow Lamination Kit.
If you have any questions I advise you to visit the Nanobrow website → nanobrow.us where you can read more about the lamination kit or the formulas of the products while the blog itself provides you with practical tips for brow makeup and care.
‘Till next time! 🙂
Mary
Mary. I completed cultural studies and I work for a big publishing house as a promotion and marketing coordinator. In off hours, I like to spend time with my family and friends whereas in the evenings I write one of the best beauty blogs :) I'm a perfectionist so every post, review and guide is a result of thorough research and duble checking. Have a nice reading :D